
(re)Learning Film with a Mamiya 645 Pro
Getting started with a medium format film camera

As some background context, I studied photography in school, double majoring in Business and Communications with an emphasis on photography. I pursued photography professionally during school and after for some time to generate some income, working across commercial, weddings and private events. It was a great experience that I look back on fondly, but the point is that I have some background in both film and digital photography. That said, I had no experience with medium format, and I’m here to share some early experiences in case this is helpful to others who want to explore medium format photography.
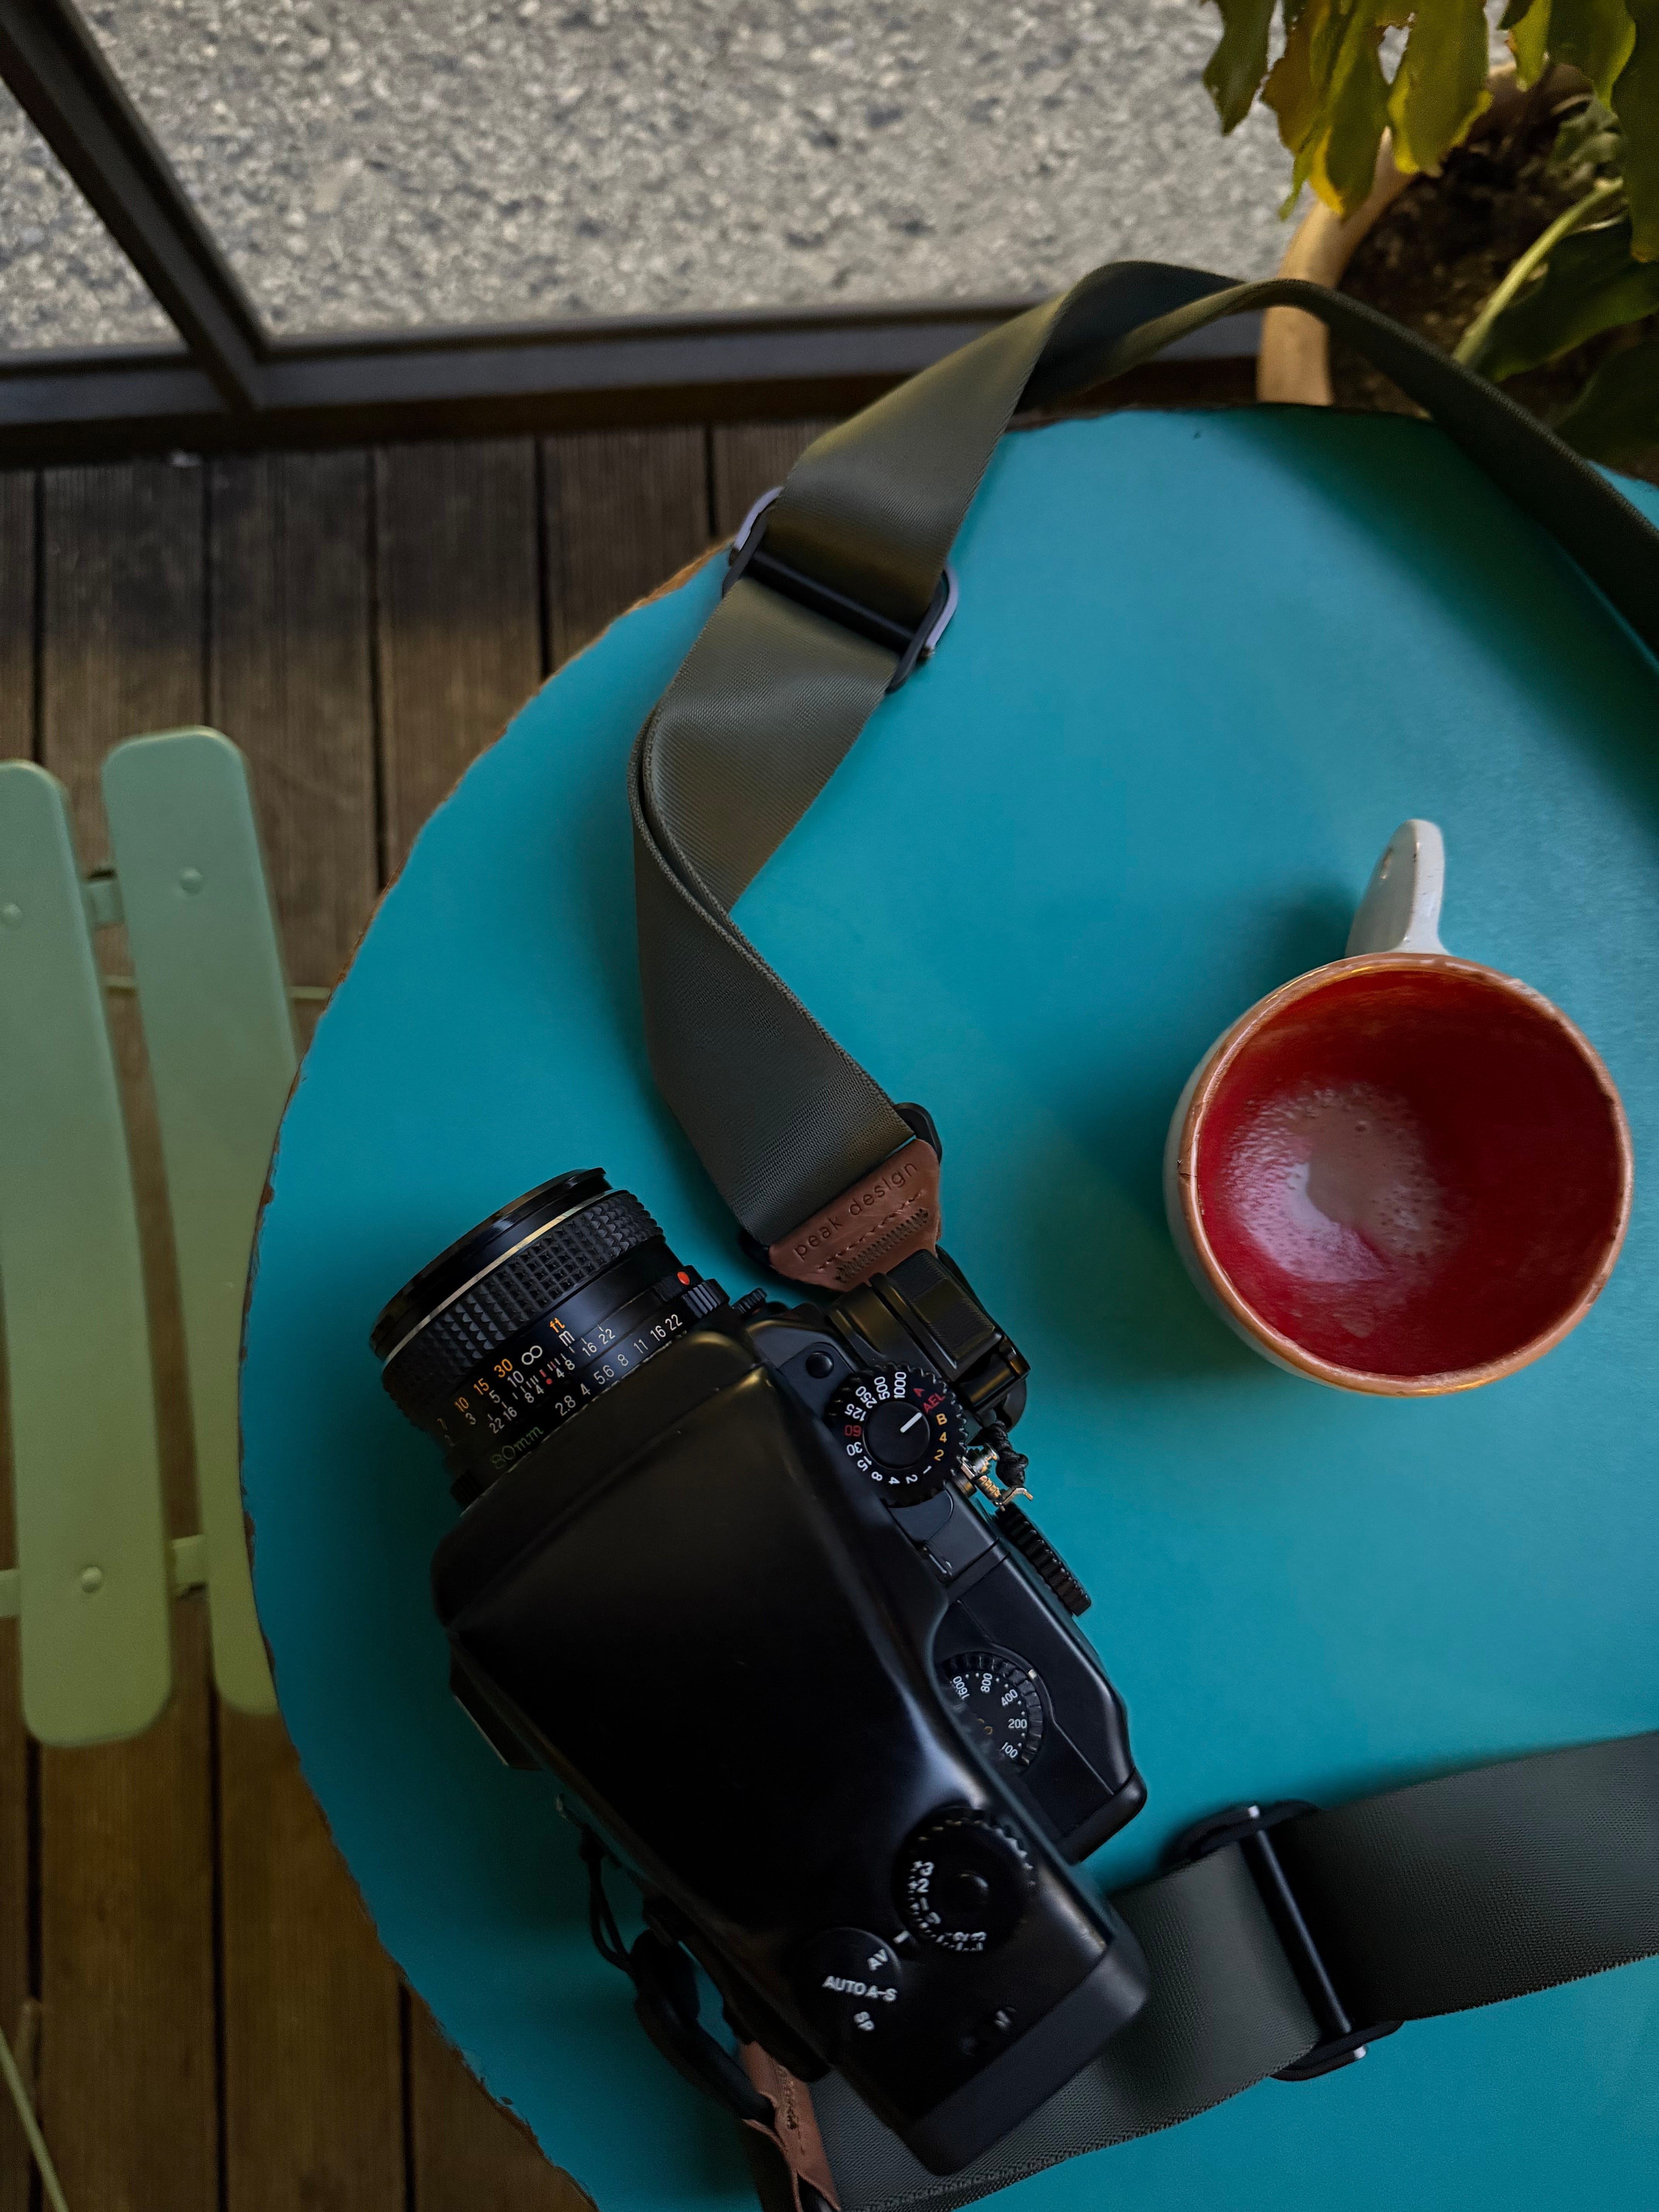
I have expressed interest in picking up medium format film photography for some time, and for my most recent birthday my wife purchased me a Mamiya 645 Pro with a 80mm f/2.8 lens, and a prism viewfinder. She did a ton of research, chatted with folks on Reddit and ended up buying the rig from KEH, who were very helpful in the process. She’s obsessed with the details, as am I, so her efforts were rewarded with a beautiful camera, and I was rewarded with an incredibly thoughtful gift.
We found a manual here that someone had graciously uploaded. You can find these around the internet, and it’s really awesome that people are helping to keep this type of information flowing. Additionally, there are some great YouTube resources for getting started. I may go back and create some short form videos for particular aspects of using the camera in the future as well.
Now, I quickly took the camera on a long weekend trip to Healdsburg, CA and was so excited to get the film back and develop it.
Quick tip: when flying, you can easily request a hand inspection of your film and camera, so you can avoid running it through the scanners. Regardless of ISO, I have now done this several times, and it’s really simple, so I’d just do that to be safe.
Learnings: this is not 35mm film. Now, for those more familiar, this will be incredibly obvious, but when you finish a roll of 120 film, you effectively lick it like a stamp and seal the roll to avoid light getting to the film itself. I did not do this. My film was ruined from this trip! Also, let go of things quickly. I was so disappointed, but at that point there was nothing to be done.
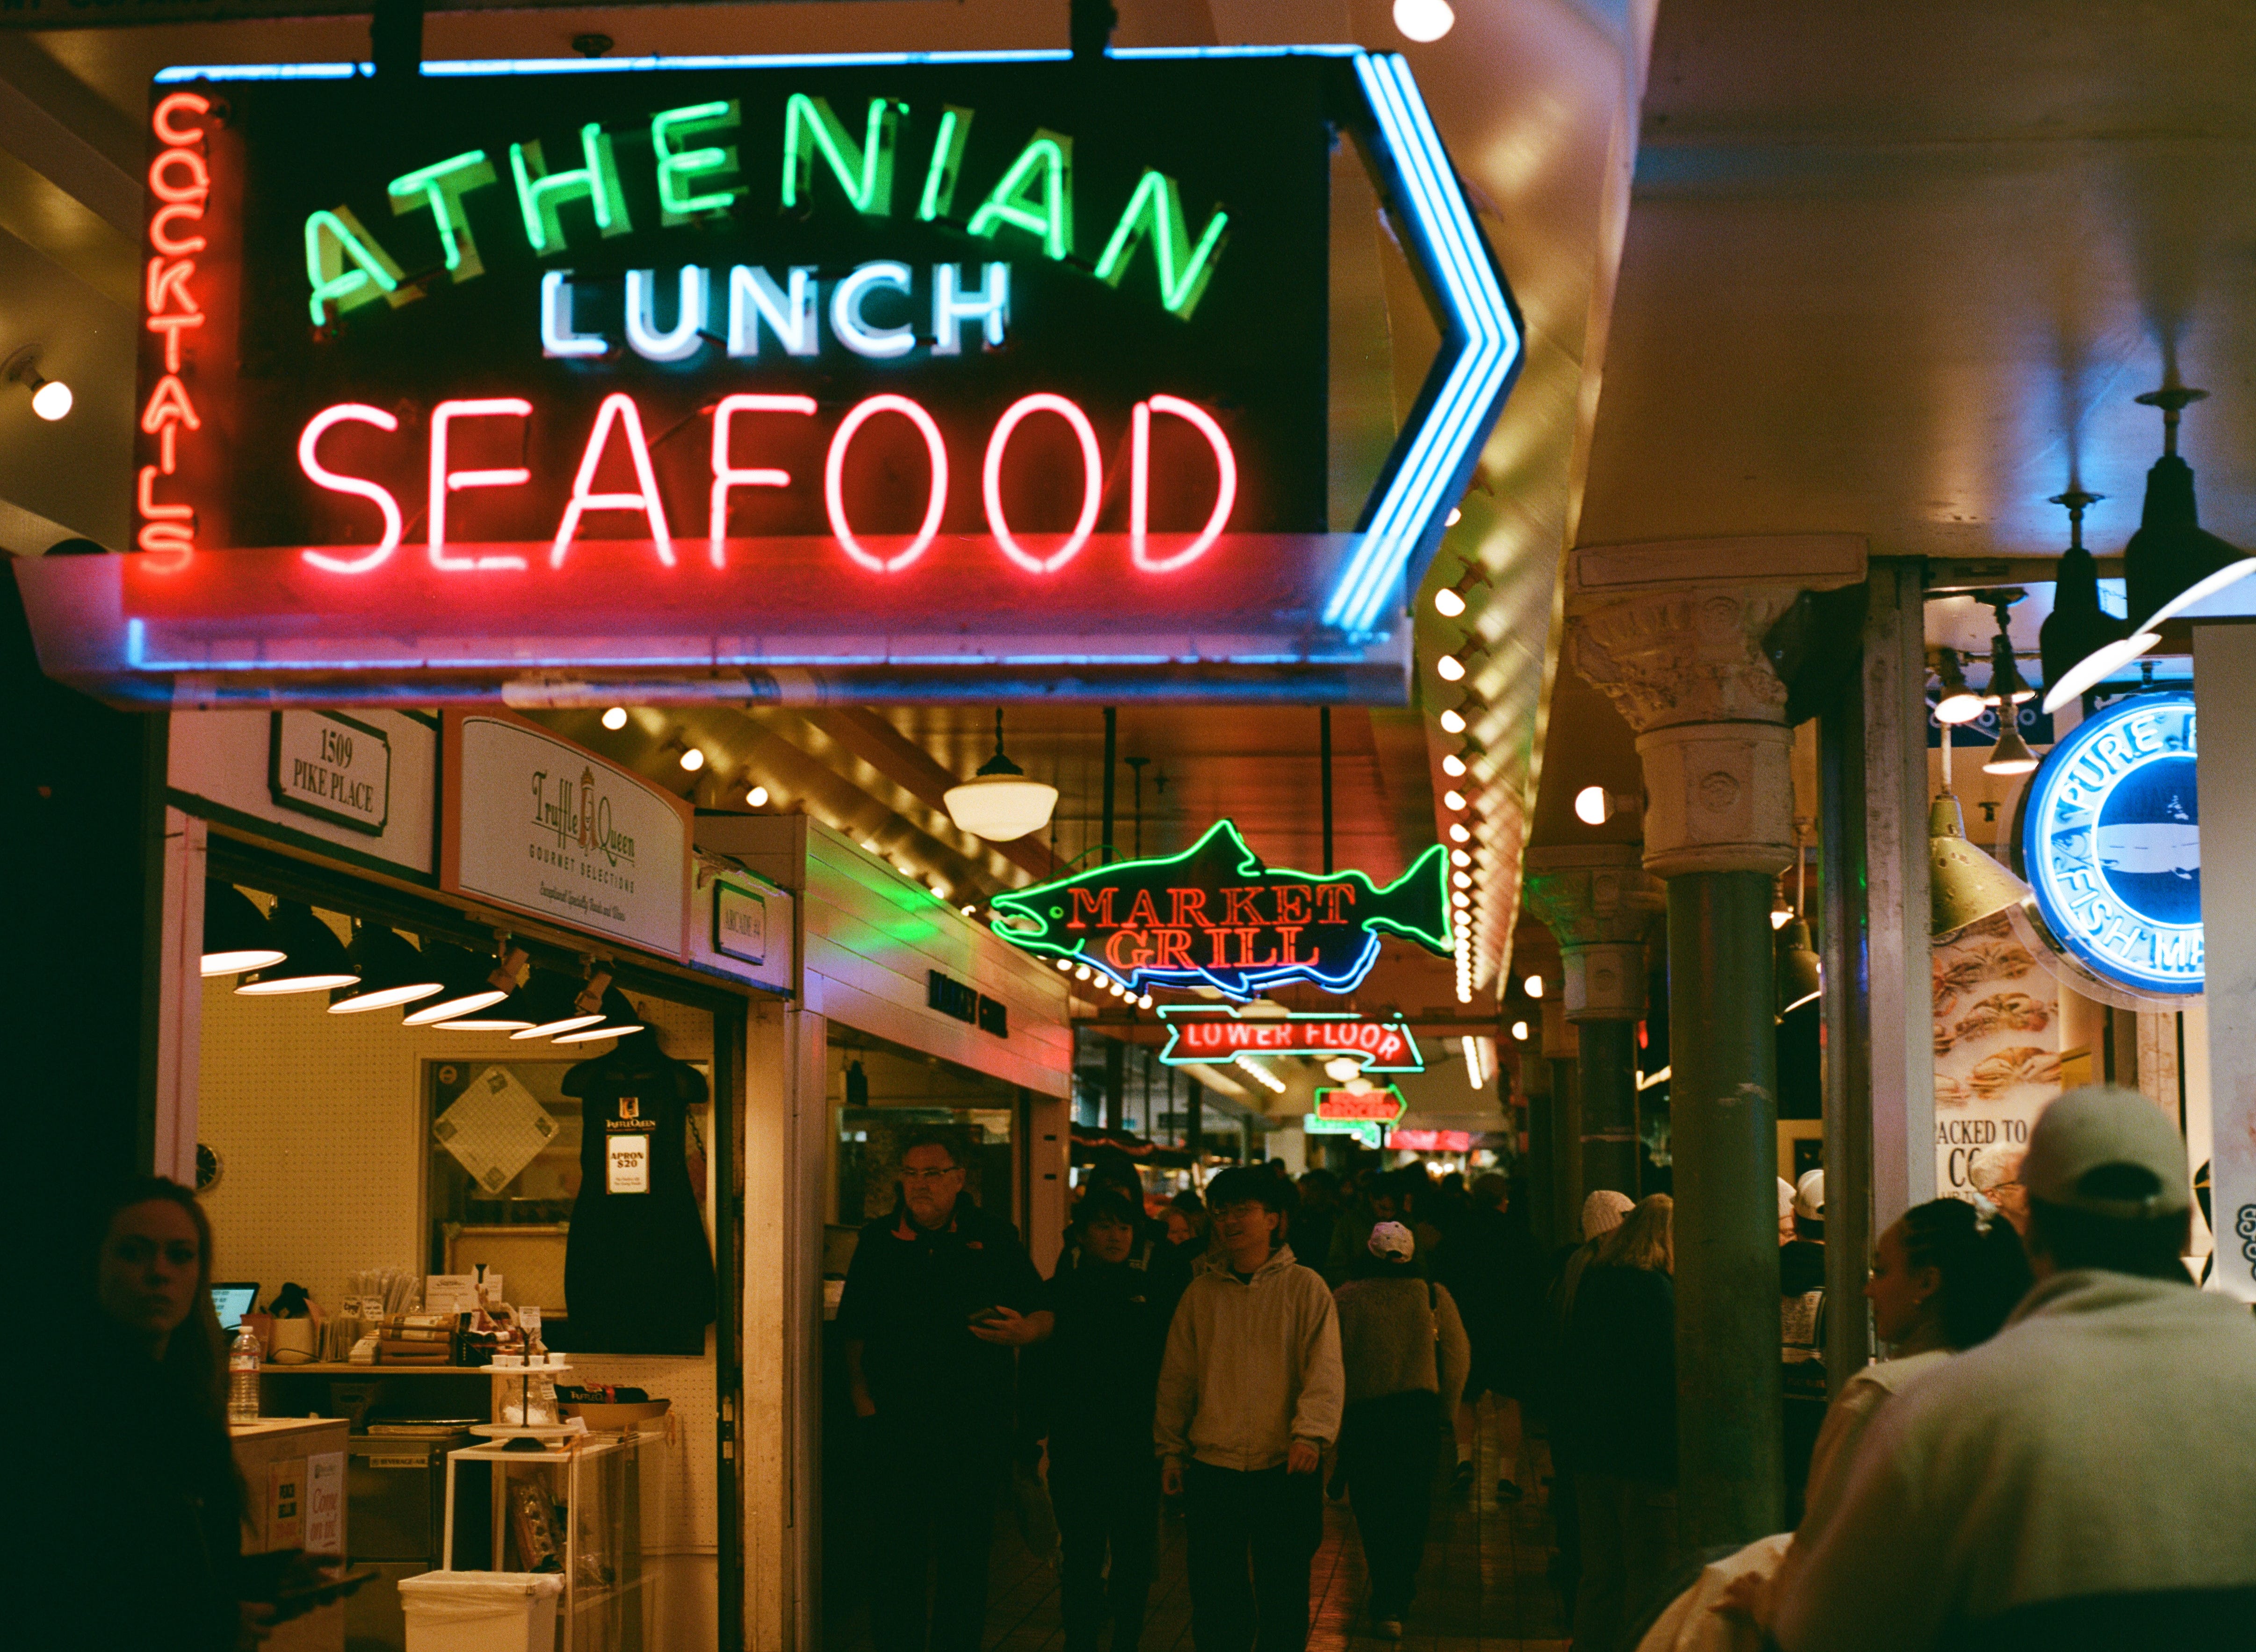
I had another chance to practice, this time in Seattle, WA. During this trip, I succeeded in shooting a couple rolls and coming back with a half used roll. I dropped the finished rolls at Glazer’s in Seattle before flying home. They were very helpful and easy to work with, and I received a WeTransfer link with my photos in the time they estimated and my negatives in the mail shortly thereafter. This time, I was happy with the results! Sharing a couple here, and you can find more here as well.

Getting started, I really focused on some basics of recalling the ins and outs of manual focus, and I utilized the metering from the prism viewfinder, focusing mostly on adjusting aperture for depth of field and light control. This simplified the number of variables up front and made acclimating easier.
The thrill of shooting film vs digital is never lost on me, but I also take lots of photos with my iPhone and due to the expense of film will always mix approaches, using film sparingly for the shots I think most effectively will translate to the medium. That said, there’s no substitute for taking 15+ photos and not knowing what you achieved until you see the results for the first time. Quick tip: while leveraging a light meter such as a Sekonic L-308S is a great way to ensure you’re exposing accurately, you can also snap a few photos on your iPhone to check and adjust settings prior to setting up your film capture. For me, it’s mostly an exercise in just trialing the camera and seeing what it produces and learning to tweak and adjust as I go.
I shot the following film while there and was very pleased with the grain structure and saturation: Kodak Ektar 100 color; Kodak Portra 400 & Ilford HP5. Shooting 100 ISO is awesome, but just be sure you really have sufficient light if you’re going to be shooting handheld.
My next purchase is likely to be a plunger, and I’ll share more about my initial gear setup in a future post. In addition to the gear setup, I edited in Lightroom and am also relearning that tool as well after quite a long time! I’ll write a follow up that includes some learnings and observations from using Lightroom for these photos. I’ve only scratched the surface thus far.